Introduction
We’ve come to a point at which technology allows us alternatives for communicating in sufficiently personal ways. In the past 8 years, we at iRoofing have harnessed technology to assist contractors in doing many of the sales presentation and roof inspection tasks remotely.
This guide follows the simple logic we share with our clients. Roofing sales and services can be closed from afar. This is achieved through using our roofing software and a streaming service. It only requires a few set-up steps.
The practices we are recommending here have served many property owners and contractors, and continues to do so, even in ways we could not anticipate.
Remember, iRoofing is happy to provide roofing sales training and support. Now, you can be fully prepared to bid more and close more sales… and do it all from anywhere.
Thank you,
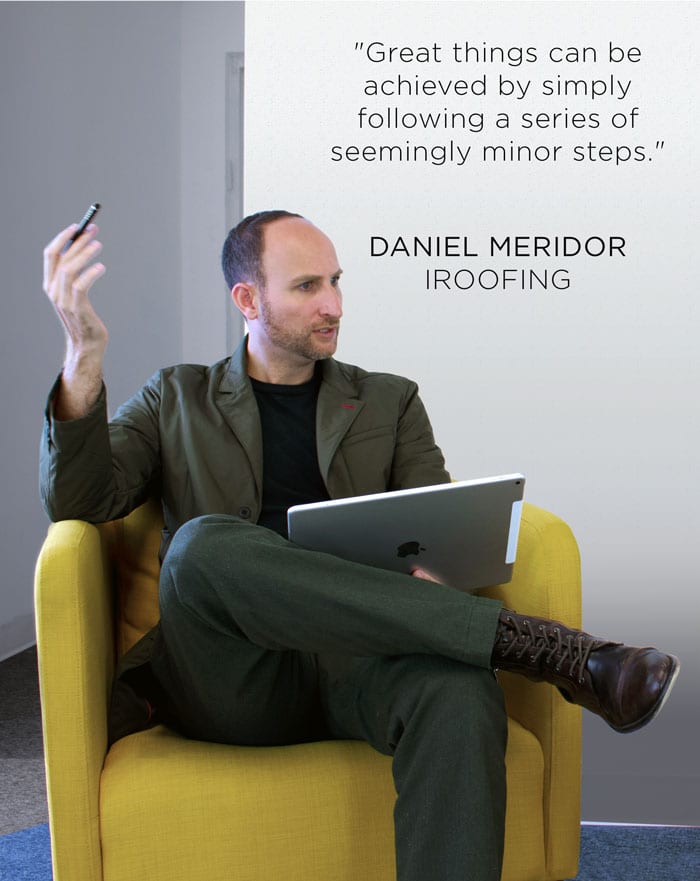
Daniel Meridor co-Founder & co-CEO - iRoofing
1. BEFORE SCHEDULING A VIRTUAL MEETING - APP SETUP
What do you really need?
- The iRoofing app
- Any streaming service of your liking
The iRoofing app is a monthly or yearly service and can be downloaded from the App Store, as well as, Google Play store.
Streaming services are generally divided into two groups. The first group requires both the presenter and presentee to download a software, such as Skype. The second group requires only the presenter to download the software, then share a link that allows anyone who they invite to hop in and interact, such as, Join.me and Zoom.
A. Customize your iRoofing App
As an iRoofing subscriber, you’ll be ready to perform remote, unlimited measurements from the moment you sign on. However, to make the most of the technology there are a few highly recommended set-up and configuration tasks you should perform.
Customizing iRoofing to your unique company needs will help you close more sales through digital presentations on-site or from afar.
App Customization - Pro Tips
- Make sure your company logo has been uploaded to the app. You can do this yourself but iRoofing normally does it for you when you sign up.
- Add a presentation for your company and any educational materials that can benefit property owners.
- Hide/display manufacturers in the in-app Digital Catalog. You can customize the inventory of any manufacturer to show only the materials you sell.
- Get your Roof Estimator templates ready. (Refer to the section entitled Generating an Instant Estimate, contained in this guide.)
- Use the iRoofing spreadsheet to input addresses of past jobs. These will activate locator pins on an interactive map. You can organize jobs by type and material used.
- Upload your Contracts and Terms & Conditions so that you’re always ready to close a sale.
B. Create your About Us section
A digital About Us presentation within the iRoofing app will impress customers and always have you outshining the competition! Any guide on how to sell roofs with remote technology begins with a great presentation of your brand!
Digital Pitch Book - Pro Tips
iRoofing recommends including these items in your About Us section:
- Aim for a minimum of 20 slides showcasing your company.
- Include a slide with your company values.
- Add a team photo with everyone wearing logo’ed attire.
- Show off your branded company vehicles.
- Include images of company and individual certifications, awards, and special licences.
- Show involvement in your community, i.e., sponsorship of a little league team.
- Showing before-and-after images of past jobs is another effective roof sales tip.
- Outline your preferred products and quality standards.
- Don’t leave out customer testimonials (video testimonials can be included!)
- Illustrate why you use technology and its advantages to the customer.
- Outline your roof removal, disposal, installation, and clean-up process.
- Add educational illustrations, such as, key components of a roofing system.
- Address material selection and when it makes sense to change or upgrade.
C. Configure the In-App Digital Catalogs
Configure your digital manufacturers’ catalog in the app by displaying only the manufacturers’ model lines and colors that you sell.
Organizing Catalogs - Pro Tips
- Remove any product or color you’re uncomfortable in selling. Make them your customized catalogs.
- Be ready to discuss with the client, products that are Good/Better/Best and why you consider them so. This could help in putting the client into a more durable product with a better warranty.
- Show examples of the materials available and give them a sense that you will be eliminating any guess work when it comes to their product selection decision. Product selection indecision can slow down the process of closing the sale.
D. Setting up Estimator Templates
The iRoofing Estimator tool requires a minor amount of set up by the contractor. Afterall, an accurate estimate must be based on contractor-specific labor rates, material mark up, and related services such as haul off, etc.
An advantage of the tool is that it allows you to generate per SQ estimates, as well as detailed, line-item estimates. Either way, the proposal comes out looking extremely professional. As with other features of the iRoofing app, the Estimator tool illustrates the care and concern you take with each project and your effort to deliver the best value possible.
Estimator Inputs - Pro Tips
- When inputting labor costs, you can define specific variables, such as, costs to install versus costs for tear offs.
- Your labor cost can be controlled based on roof pitch, too. Labor required for extremely steep slopes may run higher and require special safety equipment.
- Tear off labor costs can be based on the number of layers of old material to be removed.
- Define your costs for dumpsters and trash removal.
- Set a profit percentage or apply a customized mark-up based on the unique aspect of a particular job. For small jobs, a percentage mark-up may not yield enough income, therefore enter a fee in the Estimator tool, instead.
- Customize your template by including the tax rates for your operating area.
- Set the mark-up on the materials and accessories you will use on the specific job.
- Set up your notes. These can appear in any estimate with the click of a button.

E. Show your previous projects on an interactive map
When setting up iRoofing for the first time, you have the option to upload an excel file with all of your current customers and past projects. The app automatically creates pins for each job location and illustrates them on an interactive map! The map indicates every bid and every job you’ve done. Showing all your local activities makes for an impressive presentation!
F. Make sure to upload your Contracts, Terms and Conditions
If you have your own special format for contracts, just upload them to the app. iRoofing has built-in test contracts in order to show you how the feature works.
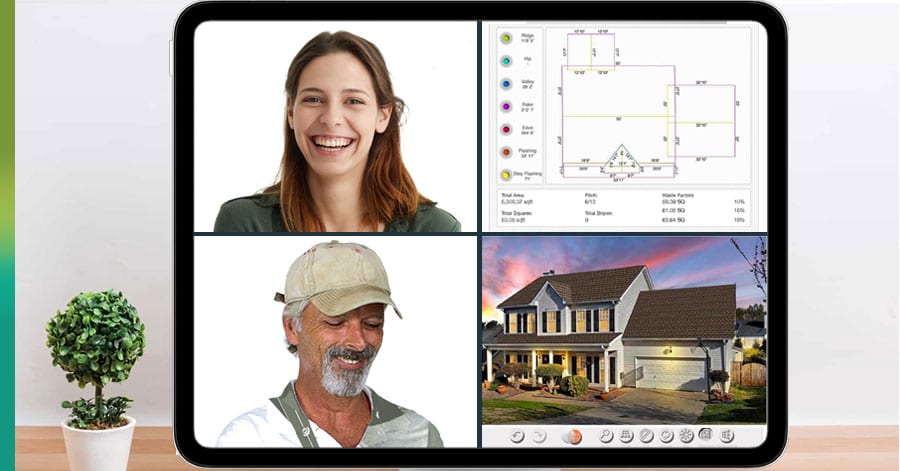
2. SETTING UP VIDEO CONFERENCING
Video conferencing is a simple and effective way to practice social distancing. In general, virtual meetings are also a great way to close a sale from afar, while still interfacing with clients on a personal level.
A. Set-Up
Skype, Zoom, and Join.me are a few of the most popular video conferencing tools. Zoom is the tool iRoofing recommends. Zoom is easy to use and it works well on mobile devices, including iPads and Android tablets, which is how contractors use the iRoofing app. Zoom has a free version, but to avoid hiccups, subscribe to a basic plan.
Explain to the client why you are offering the convenience of video conferencing, how it can be less intrusive than an in-home meeting, and how it’s an effective way to practice social distancing.
Let the client know what they’ll need in order to participate in the video call, including a good Internet connection and a laptop, desktop or tablet. For Zoom meetings, all your client has to do is click a link in the meeting invitation which quickly downloads the software… and they’re in!
How Do Other Roofing Companies Do It?
The Roofing Company of South Carolina is promoting Touch-Free proposals.
“…The Roofing Company went COMPLETELY digital to ensure you can continue to repair, replace or maintain your roof with ease.”

Setting Up a Virtual Meeting - Pro Tips
- Be prepared! If you are experienced in doing virtual meetings, or you’ve rehearsed for your upcoming session, you’ll move through it in an organized, professional, and timely fashion. Taking long pauses while wondering what to say next or stumbling over words makes viewers uncomfortable.
- Set up the scene in your office or home. What customers see in the background should look neat and professional.
- A bright, well-lit set works best and reduces shadows.
- Wear your company attire. A clean, button down work shirt or polo bearing your company logo reinforces your professionalism.
- If your business partner or a crew member is nearby, it’s nice to have them pop-in for a visit! Same goes for any furry, 4-legged mascot. Let them make a cameo!
- Silence any ringtones and keep out other ambient noise to the extent possible.
- During the virtual meeting, always look straight at the camera, NOT at the screen in front of you. Making direct eye contact is friendlier.
- Don’t forget to keep your camera on while sharing screens with your client. They’ll continue to see you in a small inset window.
B. Schedule the presentation
Set a schedule for your virtual meeting with the client on a date and time that’s convenient for both of you.
Scheduling a Virtual Meeting - Pro Tips
- Use the invitation feature built into the video conferencing app or system calendar, i.e. Outlook. Either way the client will receive the digital invite and automated reminders to join the meeting as it draws closer.
- Make clear in the meeting title what you will address in the session, i.e., Smith Residence – Roof Replacement Project presentation. In the meeting description, tell them what to expect… I’ll be sharing my presentation screens as we go through the details of your roofing project, including the cost estimates.
- Tell your clients to watch their inbox for your invitation, and, that it might be coming straight from Zoom if you’re using that video conferencing app to schedule the meeting.
- Ask clients to contact you if rescheduling is necessary. Try to be flexible and avoid “pressuring” them.
- Make sure the client understands that, when it’s time for the meeting to begin, they must be in a location where they can connect to the Internet!
- Keep the meeting schedule brief— 30 minutes to 1 hour max— but leave a window of spare time, in case the client wants to continue. The longer they stay on the call, the stronger the relationship becomes.
3. SETUP YOUR APP FOR THE SPECIFIC CUSTOMER
A. Create the Customer’s Profile
Before meeting with your customer, add their name, address and any useful details to build out their profile in iRoofing’s customer database. This will allow you to directly navigate to their measurement and show them projects that you’ve done in their vicinity.
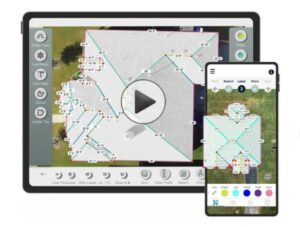
B. Create the Measurement Report
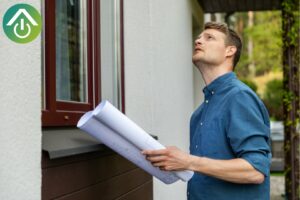
Before a virtual meeting with a client, check out the satellite images, aerial images, and street views available for their property. Normally these images are sufficient for performing a DIY roof takeoff from afar. Have the roof report ready before the meeting.
Measurement Report - Pro Tips
- Take a screenshot of the aerial view and the street view. Attach these to the meeting notice or any separate email or text communication with the client. This will personalize your communication and build your client’s anticipation about learning more.
- Seldom will either the satellite image or high-resolution Clearoof™ aerial imagery be insufficient for performing an accurate roof measurement, but if it’s not up to par, that’s OK. When you conduct the virtual meeting with your client, explain that you will be capturing aerial images from your drone or performing manual roof measurements on-site at an agreed upon date and time.
- Have you already surveyed the client’s house with a drone? From your close-up overhead images, try to observe any obvious issues with the roof condition (mold, mildew, off kilter flashing, etc.). Be prepared to talk about this with your client during the virtual meeting. Share the drone images which illustrate your concern. With the iRoofing app, you can annotate pictures by circling problem areas and inserting text. This can serve to reinforce the importance of performing a proper inspection.
- Some roofing contractors like to measure the roof with the property owner online to create engagement and customer confidence.
- Measurements created in iRoofing can be edited to display more detail or less detail according to your needs and concerns about competitive bidding.
C. Save the roof report to the client’s profile
D. Create a custom roof simulation
With a picture of your client’s home you can show them exactly how materials will look on their roof BEFORE it’s installed!
Roof Visualizer - Pro Tips
- Either take a photo of the client’s house using street view in your iRoofing app or ask the client to take a photo of the front of their house and send it to you before your meeting. (We recommend using a client-provided photo since that’s the view they feel represents their property.)
- Open a street-view photo of the client’s house. Draw the slopes of the roof and save your drawing. This will shorten the time spent setting up different displays of shingle options for your client and provide for a more polished presentation. Now, your simulations can be accessed easily through the customer’s profile.
4. PRE-MEETING CONSIDERATIONS
A. Look at the camera
Online meetings are similar to face-to-face meetings. The more you make eye contact, the more trust you create.
B. Make sure you have a clean and quiet environment
If working from home, try to dedicate a room or a quiet space for the meeting.
C. Don’t look at your cell phone during the meeting
If it’s an emergency, make sure you have someone else take care of it prior to the meeting. The worst thing you can do is to seem disinterested in the project.
D. Make sure your Roof Report is accurate and complete
Did you measure each roof part? Is all the proper labeling included? Did you add in the accessories?
Pre Meeting - Pro Tips
- Have the meeting link ready to share in case the client lost track of the meeting notifications.
- If you are using video conferencing for the first time, it’s a good idea to spend time practicing with it before the meeting, so you can help clients efficiently and smoothly begin the session with you.
- Instruct customers on how they can view your shared screens.

5. YOUR LIVE PRESENTATION
Go into each live presentation with the goal of closing the sale! Make sure the client has logged into Zoom or whichever video conferencing tool you’re using. Have your camera turned on. Even when you’re sharing screens you will still appear to them on a small section of the screen.
A. Introduce yourself
Greet the client and begin with cordial conversation. Ask if it’s OK to share your screen.
B. Share your screen
C. Show the main screen of your iRoofing app
Make the client understand that you are using technology to present, measure, and estimate projects. Being a hi-tech roofer can make a great impression.
D. Presenting your Pitch Book (About Us)
A digital presentation within the iRoofing app will impress customers and have you outshining the competition! Present your pitch book, emphasize your qualities, speak of your work ethic, your warranty, your happy customers, and how neat you leave the site after the job’s done! Instilling trust with your potential customer is key.
Pitch book Presentation - Pro Tips
- See the section above entitled Create your About Us section.
- If your company adheres to defined roof inspection, repair, and replacement processes, outline the applicable process with your client. This will establish confidence in your professionalism and reliability.
- Describe the steps you and your crew will follow in performing a proper roof project assessment, landscape and garden protection, roof removal, tear off disposal, new roof installation, quality control, and finally the clean-up of the site.
E. Show the client the projects you've done in their area
Navigate to the iRoofing Customer Database. Show your client all the projects you’ve done in their area, which are illustrated by locator pins on the interactive map. You can organize these by material type… asphalt shingle, metal, tile, solar shingles, etc.
Customer Database - Pro Tip
- It is easier to navigate to this section when you have your potential customer in the system prior to the meeting!
F. Show your client the Roof Report you prepared
Show the client the takeoff you prepared for their property or go through the process of measuring their roof online with them. Explain to them that the report is verified by satellite and aerial technology to eliminate human errors. Whether you go through the process with the property owner in the meeting or do the remote roof takeoff beforehand, briefly explain the steps you go through. A more informed property owner will be more confident in their decision-making.
Digital Measurements Presentation - Pro Tips
- Explain how your remote measurement approach assures added safety in running your business, while it saves on gas and other travel and labor expenses that you try to pass along to the customer.
- Suggest how your efficient, hi-tech approach could potentially make room in their budget for material upgrades and accessories.
- Show them the roof report and give them rough cost estimates for Good/Better/Best materials.
- Some contractors walk their customer through the iRoofing measurement process online. Try it! Your potential customer will appreciate your technical approach and your desire to educate them. This can also solidify your leadership position if other contractors are bidding.
- Use the iRoofing Pitch Detector tool to demonstrate how roof pitch directly influences the accuracy of a measurement. First, be sure the street view of the address is sufficient in making use of the Pitch Detector (good frontal view of an eave and rake), which you can do prior to the virtual meeting. (See section entitled Create the Measurement Report.)
- Reinforce the value of your careful measurement process as a means to ensure cost accuracy, reduced waste, and avoidance of project delays due to material re-orders or excess.
- Show the iRoofing roof part labeling and accessories functions and explain how these factors also ensure accurate estimating of the roofing project.
- Emphasize how your satellite, aerial or drone imagery can eliminate human errors and help avoid mistakes.
G. Show the client their product choices
Select the roofing products you believe will fit the style and colors of their home. Use the iRoofing Digital Catalog to do this. You can save selections directly to the customer’s profile.
H. Demonstrate the Roof Visualizer
Hi-Tech roofing contractors routinely attest to the sales potency of the iRoofing Roof Visualizer. The Roof Visualizer enables contractors to precisely illustrate how a new roof is going to look using an actual image of the customer’s home or building.
Roof Visualizer Presentation - Pro Tips
- The Roof Visualizer is simple to use, but practice a little before you present the tool in a virtual meeting. Your iRoofing Account Manager will be happy to show you the ropes. It’s the best roof simulator in existence, hands-down!
- Before the meeting, create a roof visualization using a street view image of the client’s property. Choose any material you think looks and performs well or do this with the client while on the video conference.
- If the image from the street view is unsatisfactory, ask the property owner to send you an image of the front of their house. Upload it to the app and use the Roof Visualizer with any material they choose during the meeting.
- Discuss and simulate upgrades to standard shingles or tiles which the customer already has on their roof.
I. Generating an Instant Estimate
Now, you’re ready for an estimate. Since you already saved a template, you can either upload it as a price-per-square or as a full estimate to share it with your client. Go over each section and explain services, labor charges, etc., in order to create confidence that you are charging your client for work to be performed.
Instant Roof Estimator - Pro Tips
- Make sure your company logo has been uploaded to the app. iRoofing normally does this for contractors as soon as they sign up.
- If you have any support needs related to customizing Estimator templates, reach out to iRoofing and an Account Manager will address your needs expeditiously.
J. Using Digital Contracts
Everything you need in order to close a roofing sale is in the iRoofing app. When on-site with a client, digital contracts can be signed right on the screen. For doing business remotely, the digital contracts still facilitate the sales process effectively.
Digital Contracts - Pro Tips
- When you share your reports, estimates, and other project-related presentations with clients, include closing documents. Ask the person to read and sign the contract, then return it to you after they scan it or share snap shots from their phone.
- You can print and mail the complete proposal and executed contract or email straight from the app.
- If you need to make a change to the contract, do it within the app and resend the paperwork to the client in order to minimize a delay in finalizing the sale.
K. Sign a contract
If the client is ready, you can digitally sign the contract together on-site. If not, share the estimate and schedule a follow-up meeting with the client to go over any questions or concerns that they might have.
6. WRAPPING UP THE VIRTUAL MEETING
If there wasn’t enough time to go through the product selection and roof simulation steps; or create the final estimate using the iRoofing Estimator tool, a follow up meeting should be scheduled.
Wrapping Up - Pro Tips
- If there wasn’t time to show your client iRoofing’s Roof Visualizer, then, while in the video conference at least get a good idea of some materials the client likes, including roof color.
- Help them to understand the variety of quality levels and tell them you can base your forthcoming job estimate on three levels— Good/Better/Best.
- Ask them if they want or need new gutters… The best time to install these will be when your team is performing the roof replacement.
- Tell them when they can expect the roof estimate. The sooner you can follow up with an estimate, the better. You should be able to send them something right after the virtual meeting ends. (See the section entitled Estimating the Roof Job.)
- Tell them you will prepare an accurate estimate immediately, based on their general or specific material preferences.
- Ask what day and time will be best for them to review the estimate, the guarantees and warranties, and the contract.
- Establish the client’s desired timeline for getting the job completed.
- Invite your client to ask questions.
- Remember… Exit screen sharing before you celebrate how well your presentation went!
7. POST CLOSING
A. Ordering Materials
Ordering materials rarely takes any face-to-face contact with your distributor, plus the app speeds up the process and eliminates mistakes by enabling all the data from your roof report and detailed project estimate to produce a professional Purchase Order!
Post Closing - Pro Tips
- Make sure you put your distributors’ contact information into iRoofing. If you do this, you will be able to send a purchase order to them straight from the app.
- Don’t worry about which products are available in your area. The iRoofing app knows already which products are carried by local distributors based on the address of your business.
- By using the app for ordering materials, all the data is saved in the in-app customer database for easy reference.
As never before, adapting to technology is critical. Don’t allow the process of learning to use software lead to frustration. iRoofing is much easier to master than you might think!
We are here to serve the needs of contractors and to help you WIN in a competitive world, and in the midst of challenging times.
Advice, support and training is UNLIMITED and FREE. And we can share roof sales tips through roofing sales training. Nothing is stopping you from becoming an effective hi-tech roofing professional when you leverage the support you need from us.
Now is the time to turn to the amazing benefits of technology for discovering new ways for how to sell roofs. By adhering to these tech-driven roof sales tips, you can fortify your company and contribute to the long term sustainability of your business and the workforce.
Thank You.
The iRoofing Team
Quick Links
- Perform accurate, unlimited measurements from afar
- Present your company with images and videos in a digital pitchbook
- Access digital catalogs showing only the materials you sell
- Show clients how any roof will look on their house with a Roof Visualizer
- Show clients a map of properties your roofing company has worked on
- Generate instant, detailed roof estimates
- Close sales quickly with digital contracts
- Manage roofing projects and leads with an in-app CRM