How to Accurately Measure Roofs from Satellite and Aerial Images
In most cases, satellite and aerial roof measurement technology is 99% accurate, if you follow a few simple rules. Achieving accurate roof measurements manually isn’t any different. A manual roof takeoff by one roofer can easily vary from that of another. But roofing software can catch human error inherent to manual work. For example, iRoofing applied a few fail-safes to avoid mistakes, if a single dimension of the roof is overlooked, you would not be able to save the roof report… the app will tell you to go back and fix the omission. Similarly, if you forget to label a roof part, iRoofing will alert you to go back and fix it. To trust the validity of satellite and aerial roof measurement software, learn to do it right. It’s easier than you think and a lot more efficient than old fashioned ways of doing roof reports.
This article addresses 9 methods to ensure that your do-it-yourself, hi-tech roof measurements are always accurate.
9 Tips for accurate roof measurements
1. Be sure the address is correct
2. Standardize your methods
3. Understand the roof geometry
4. Use Clearoof™ for high-resolution clarity
5. Double check the roof pitch
6. Get Training – It’s Free and Unlimited
7. Use Scale Verify
8. Make sure to include add-ons
9. Practice, Practice, Practice
1. Be sure the address is correct
Remote measurements start with identifying the street address of the property you’ll be working on. Simple. But 101 Northwest 10th Terrace is not the same as 101 Northwest 10th Street. In fact, in Hallandale, Florida the two addresses are 6 miles apart. Double check your client’s address before creating a roof report. In the iRoofing app, you can visually verify that you’ve got the right house by looking at a street view or bird’s eye view which are available for most addresses.
In construction and carpentry there’s an old saying, “Measure twice, cut once.” The equivalent for this in digital roof measurements is… “Check the address twice, measure once!”
2. Standardize your methods
Owner-Contractors favor ample measurements.
If you’re the owner of a contracting company, you don’t want your measurements coming up short. That can create slow-downs and even lead to shortages and secondary material orders. Property owners dislike delays, especially on home improvement projects!
Sales Reps favor conservative measurements.
If you’re a roofing contractor sales person trying to win a bid, you don’t want a roof measurement that is even the slightest bit oversized. A measurement that suggests a larger area to cover than what’s actually needed means estimates for unnecessary materials and possibly increased labor costs, as well. You may lose the job to a fastidious competitor with a more accurate and lower price!
Project Foremen favor generous measurements.
If you’re the project foreman, you hope the roof measurement is a bit generous. You don’t want your crew having to pick through the dumpster to find the last scraps of underlayment or discarded shingles suddenly needed to finish the job, or even worse, wait for a new shipment of the missing one materials.
Insurance Agents favor tight measurements.
If you’re an insurance representative, measurements that exceed the actual roof area mean that your company’s claim payout will be inflated. You don’t want that.
Make everyone happy... Standardize Your Methods!
Decision makers at roof contracting companies who’ve on-boarded the iRoofing app should convey the time and cost-saving benefits of the software to their team and require that team members get training from iRoofing. It’s free and unlimited. By fully understanding how fast and easy it is to knock out measurement reports and practicing tips and tricks for ensuring that roof sketches are precise, common standards can be achieved which are acceptable to all stakeholders. Team members need to appreciate the technology and use it as not only as a productivity tool but a sales presentation asset, as well.
For manual measurements, you normally add in a waste factor. Rest assured, the best roofing software does that automatically, as well.
Resistance to technology is an impediment to long term success. Learning to leverage technology properly, promises efficiency and profitability.
3. Understand the roof geometry
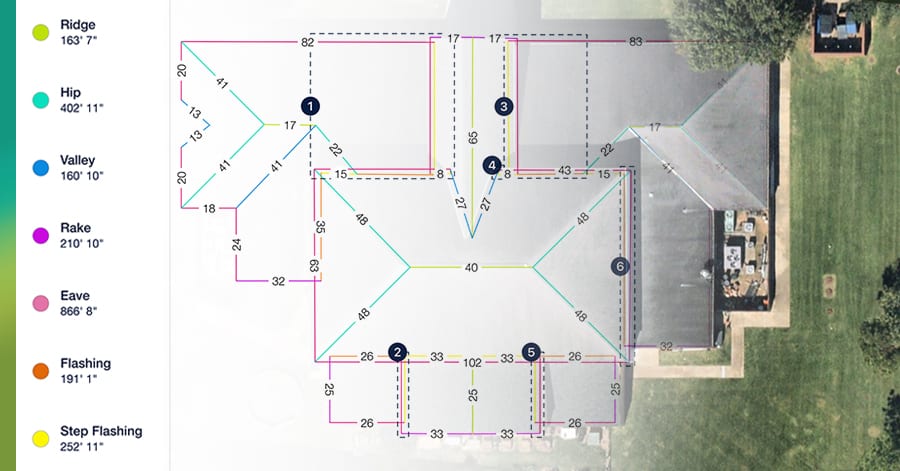
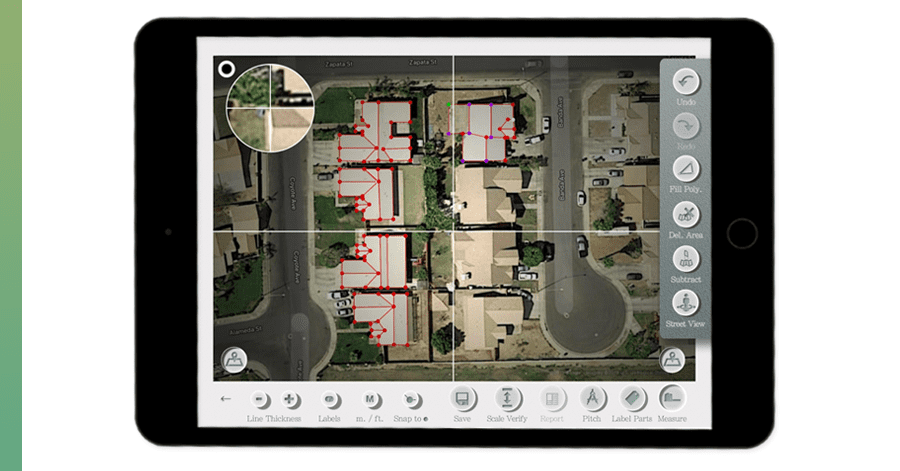
Satellite and aerial overhead images can conceal parts of the roof. It’s no problem. By knowing how to identify overhangs and sketch cleanly through tree-obstructed areas, accuracy is assured. Sometimes roofs can pose some complex measurement challenges. When it comes to measuring complicated roofs, roof measurement software is the way to go. What could take you a whole day for a roof takeoff, still only takes minutes when using satellite and aerial imagery properly. iRoofing’s toolbox has features specifically designed to measure under overhangs and obstructions. Don’t worry. It’s easy to compensate for complex roof parts, as long as you learn how and practice!
4. Use Clearoof™ for high resolution clarity
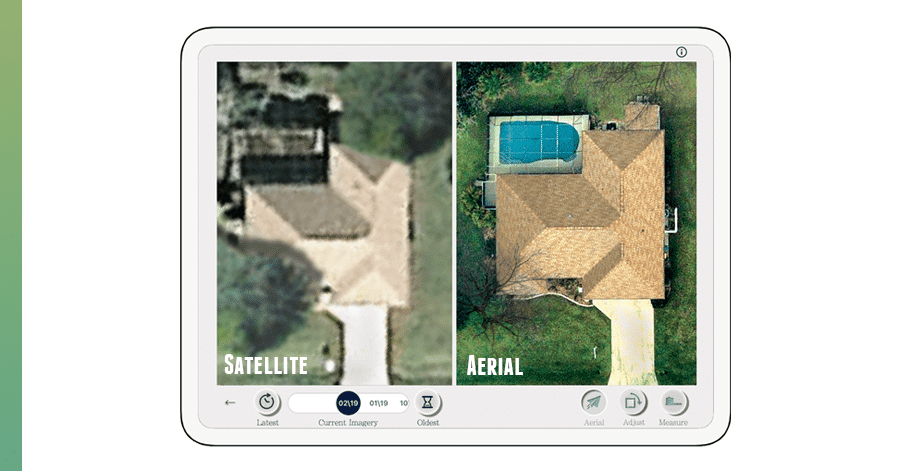
Clear overhead images translate to accuracy. While most satellite images are sufficient, aerial images can offer enhanced clarity whenever needed. iRoofing developed the perfect solution for accessing high resolution images taken from purpose-fitted aircraft. Clearoof™ — iRoofing’s method for utilizing aerial images in your roof reports — is seamlessly built into the app. It allows contractors to instantly switch from satellite to aerial images. Plus, you can choose from images captured in the recent past. This helps you solve the problem of tree obstruction in temperate locations where, in fall and winter, the leaves are off the trees, revealing clearly the roof parts obstructed in summer and spring.
The clearer the roof image, the easier it is to place your measurement points in the exact spot necessary for obtaining an accurate measurement. Clearoof™ images currently document about 70% of the US and iRoofing is working hard to expand that coverage area.
5. Double check the roof pitch
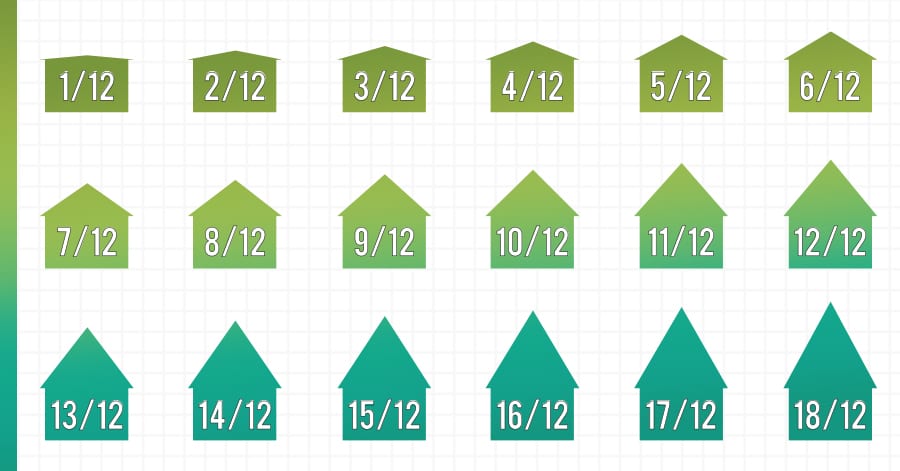
If you judged a roof pitch at 8:12 but it was actually 10:12, you could be off almost 2 SQs on a modest sized home. The dominoes start to fall from there… Now you might very well end up with a shortage of materials and delays in getting the project completed on time. To avoid inaccurate roof measurements due to pitch judgements, iRoofing recommends using the app’s clever pitch detector tool. If you’re not familiar with how it works, the iRoofing support team can walk you through the quick and simple process for measuring pitch from a street view of your client’s property.
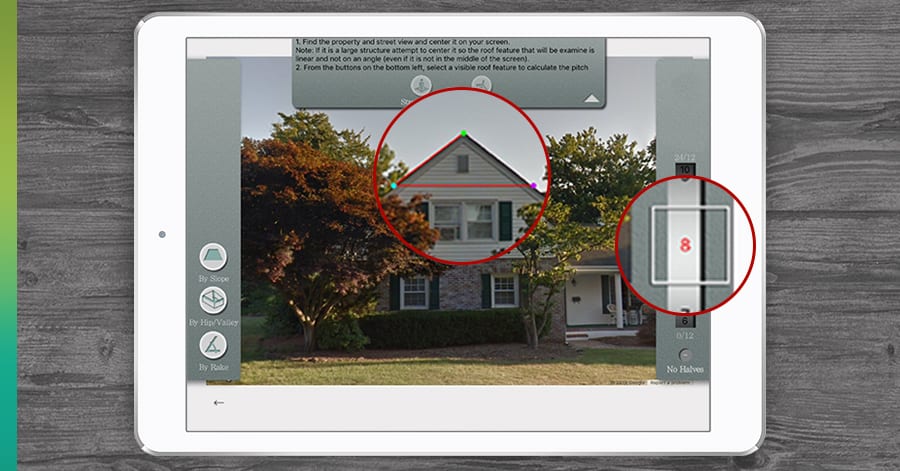
Whenever you’re on the job site, go ahead and double check the pitch measurement manually to validate the accuracy that iRoofing’s digital tool provides. Some roofers use devices with accelerometers, while others use a variety of hardware gadgets. Some manufacturers like GAF give away little transparent cards you can hold in your hand and line up angular lines on the card with slopes on the roof so you can roughly judge the pitch. It’s not too precise but it’s better than guessing!
If you’d like to make a change simply open the project on the app and make the quick adjustment once you’ve done your on-site validation. The app will calculate the adjustment and generate a new roof report instantly. (See below “Use Scale Verify.”) In the meantime, keep using the iRoofing app for pitch detection and your calculation accuracy will get better and better.
6. Get Training - It’s Free and Unlimited
The importance of training on the iRoofing app can not be stressed enough. Initial training only takes an hour. You’re encouraged to participate in 3 sessions. The tips and tricks you’ll learn will end up saving you a lot of time and ensuring your measurements and estimates are accurate from the start. The app is very intuitively designed and many contractors become proficient without training, but, by having an Account Manager walk you through the process, your learning curve will be greatly accelerated!
When you perform manual roof measurements, perhaps you “round up” each linear measurement as a means of ensuring that you end up with ample dimensions and avoid insufficient material quantities. That’s good. Likewise, during training with iRoofing you’ll learn how to place your measurements points just right so you never come up short.
Whenever you need training, the iRoofing team is here to assist. There is never a cost and it’s impossible to reach out to us too often. iRoofing is a SaaS company, which stands for Software as a Service. Its emphasis on unlimited training and support is as beneficial to your company as is the mobile, full-featured, productivity and sales presentation solution developed by iRoofing.
Also, be aware — iRoofing’s measurement tool is constantly enhanced. Feel free to contact your account manager whenever you wish to brush up on the latest additions to the software. You can find out what’s new in iRoofing by reading The Roof Report e-newletter!
7. Use Scale Verify
Scale Verify is a simple way to shore-up roof measurements. While it’s not difficult to dial-in accuracy to an inch by simply measuring carefully using the app, Scale Verify enables you to re-check your measurements if you’re not yet confident with technology. This is especially important for metal roofs etc. iRoofing’s Scale Verify feature enables you to further enhance measurement accuracy with just a single known measurement of the house, for example one of the structure’s eaves. With an absolute measurement of a single roof part, you’re able to instantly recast your roof report to align all other measurements with it. An eave can be simple to measure from the ground. You can also obtain an absolute measurement from an architect’s blueprint if handy. Plug that into your iRoofing sketch tool and tap Scale Verify. Automatically, all the dimensions will adjust and refresh the roof report with precise accuracy.
Scale Verify is seldom needed because, once you develop the skill to perform remote digital measurements, your accuracy will be sufficient. But, for those times when you want or need verification, you’ve got it in iRoofing!
8. Make sure to include add-ons
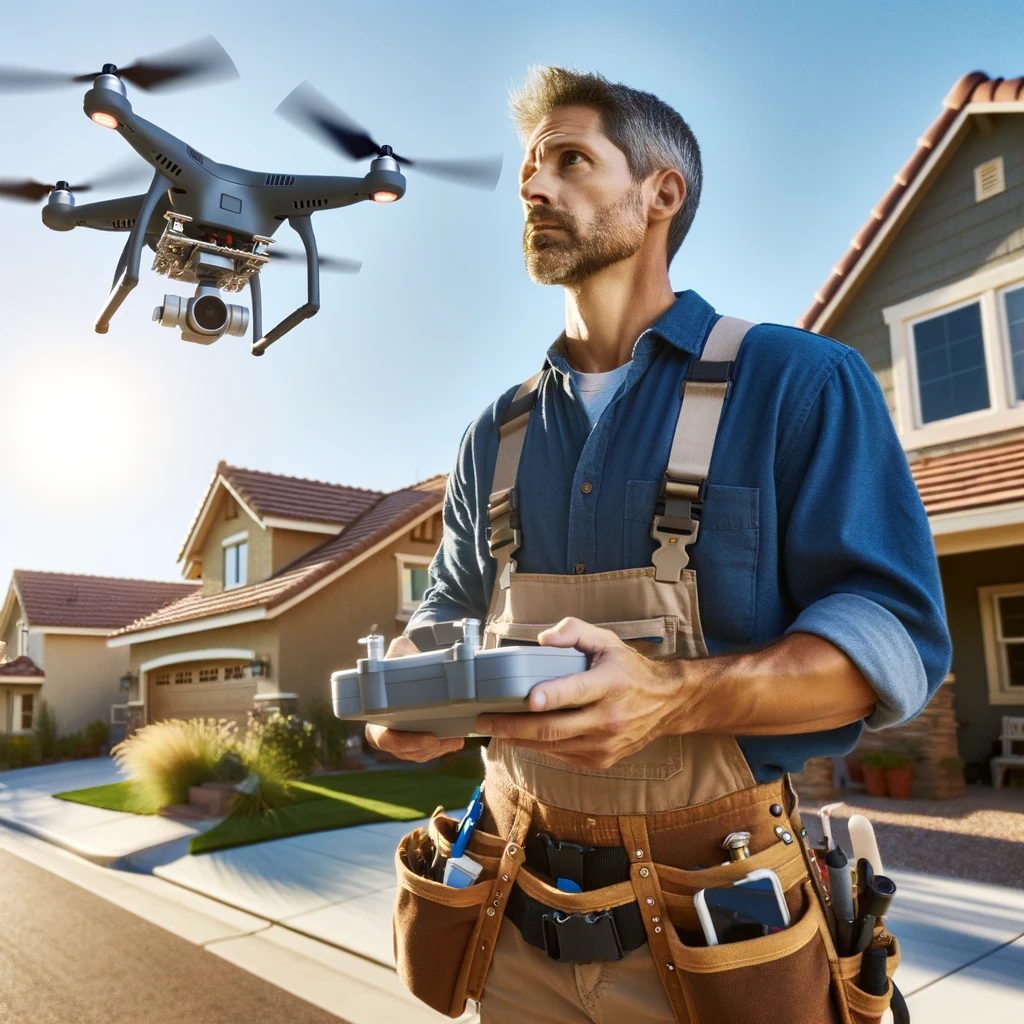
Satellite imagery is getting sharper as technology moves forward. Also, the imagery you see in the iRoofing app is getting refreshed more often, thanks to more satellites in orbit. Plus, iRoofing contains date-stamped aerial imagery for over 70% of the continental U.S. Even so, when measuring a property, you’ll want to make sure that the home or building hasn’t undergone renovations or expansions which will make your roof report inaccurate. By simply asking the property owner about any recent renovations or by taking a quick look next time you’re at the job site, you can determine if you need backup images using your drone or if you just need to get up there are measure the old way.
9. Practice, Practice, Practice
As with anything else, including manual roof measurements, the more you do it the better you get. Remember when you first joined Facebook? You might have wondered what “Poking” someone even meant. Was it a romantic gesture? Frankly, we still don’t know what to make of it! But you get the point. Practicing helps make roof measurements perfect!
As mentioned above, training is super important, but if you fail to practice what you learned in training, your competency gradually diminishes. This is true with iRoofing, so make use of the technology and you’ll attain a level of expertise and empowerment that lets you bid more jobs, close more sales and give clients more smiles.
When you’re confident in your remote measurements from satellite and aerial images, you’ll have no more need for ordering expensive 3rd-party roof reports or sending crewman out to job sites to effectively duplicate measurement efforts!

